GIBSON Les Paul Standard
Repair of the Day

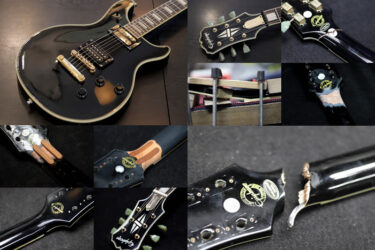
GIBSON Les Paul
レス・ポール氏の生誕100年を記念して作られたモデル。
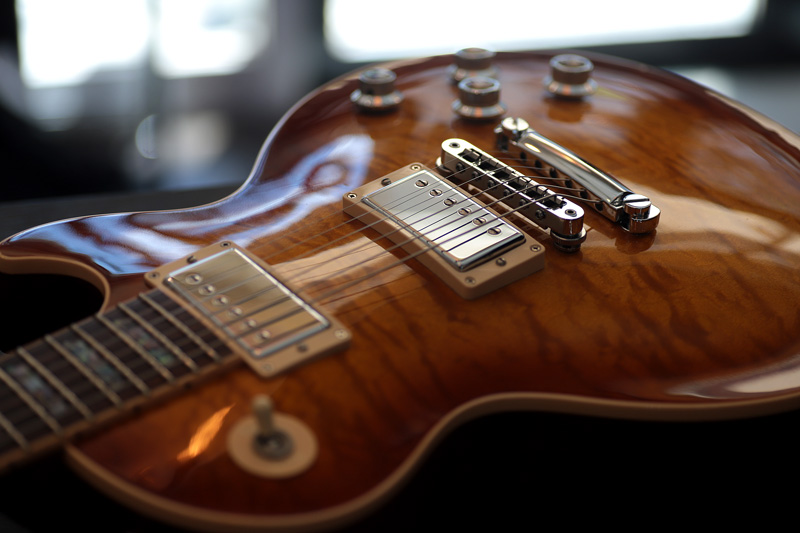
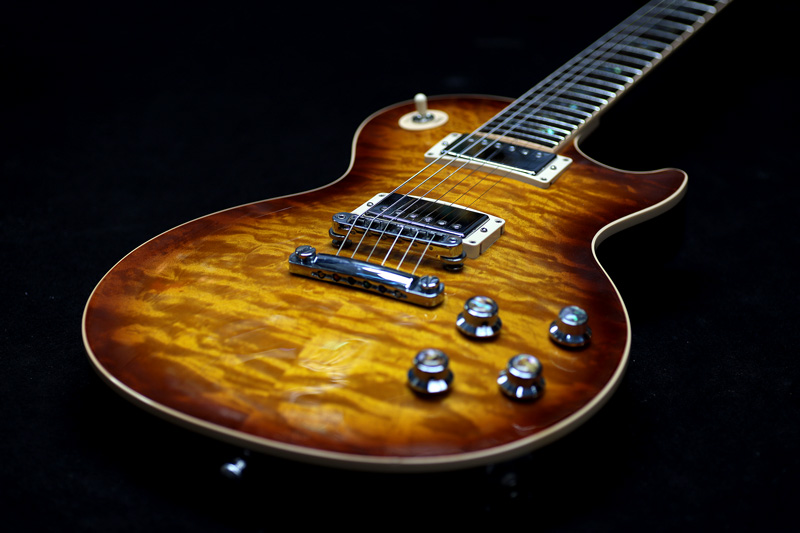
トップは木目のキレイなメイプル。
バックはモダンウェイトリーフという仕様のマホガニー
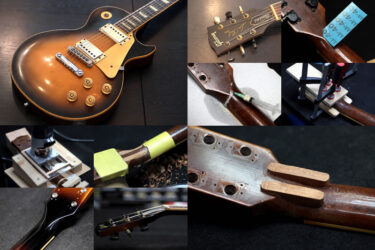
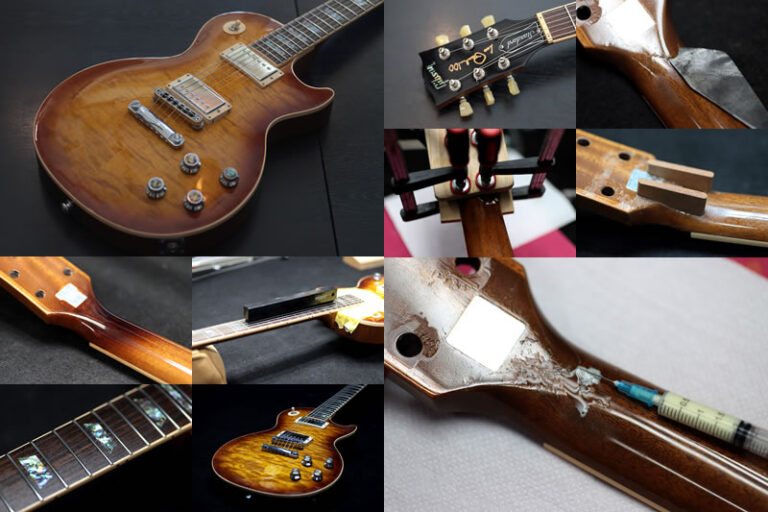
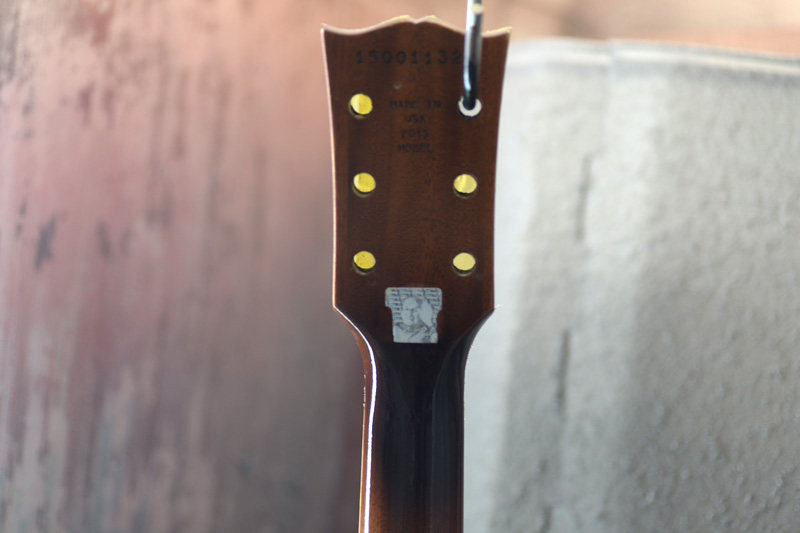
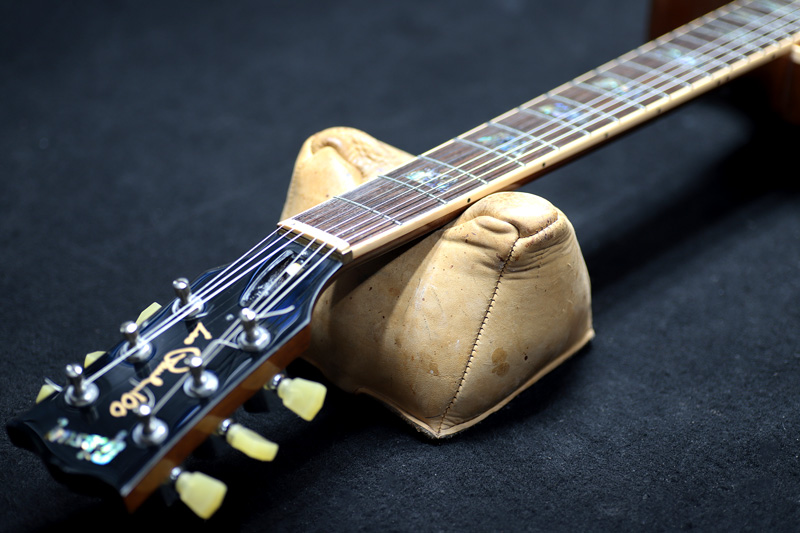
ネック状態
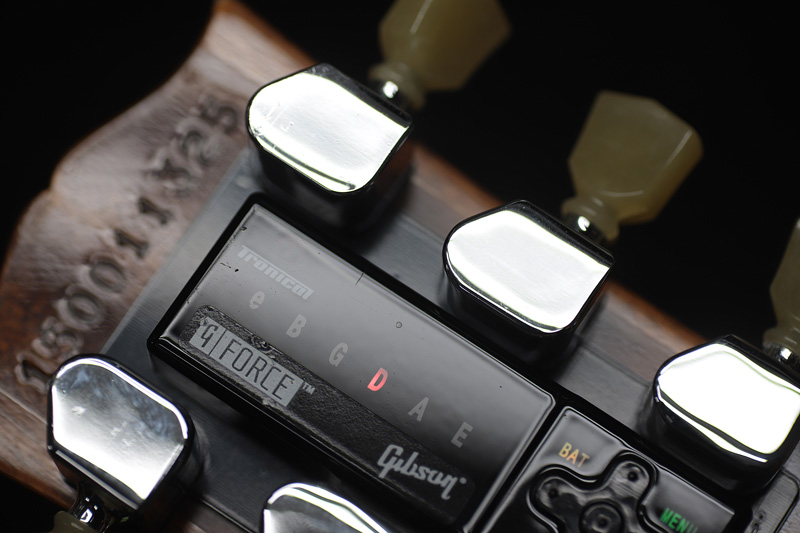
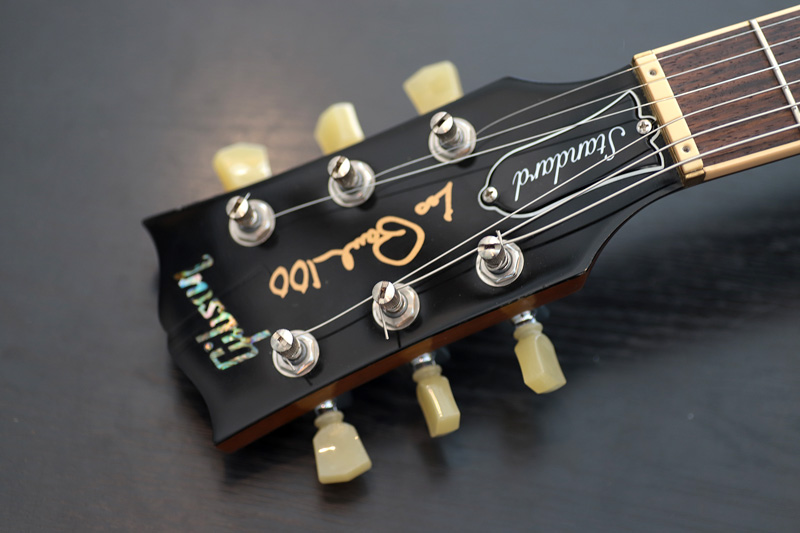
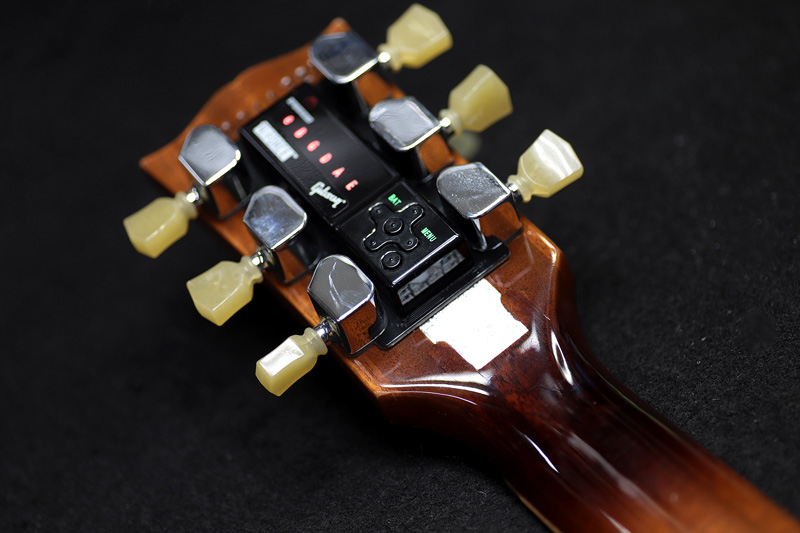
全てのモデルに G FORCEチューニングシステムという自動弦巻きが搭載。
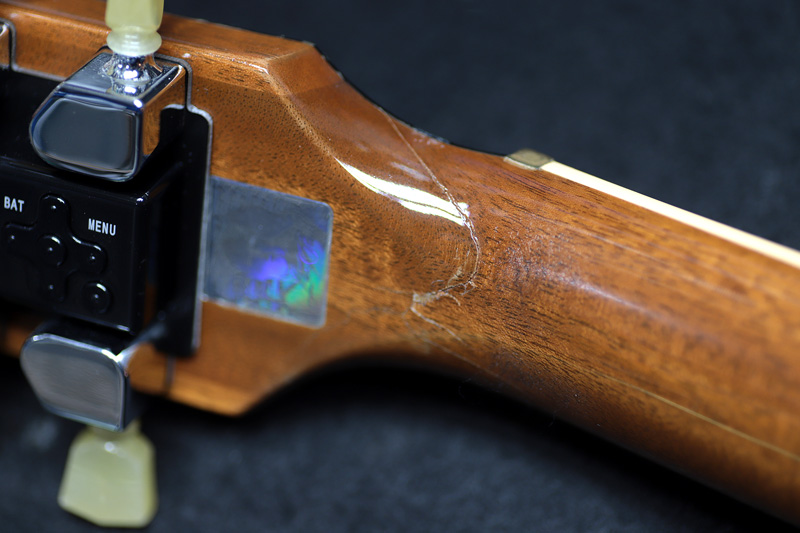
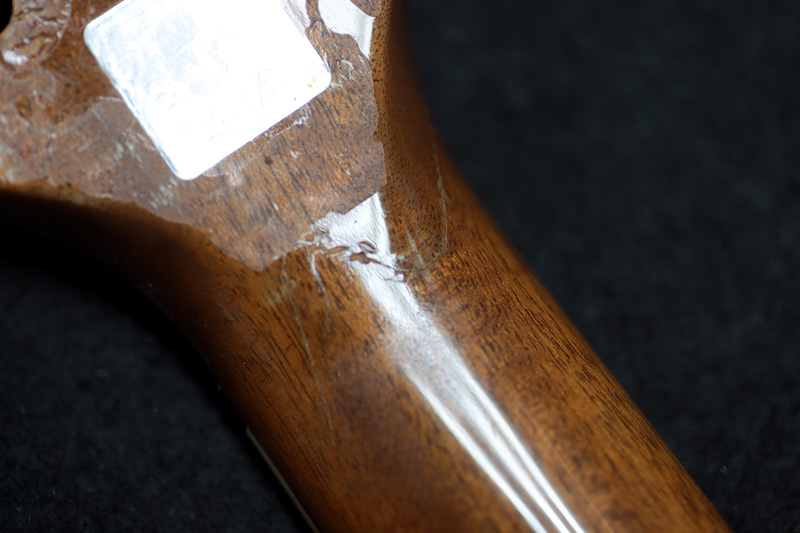
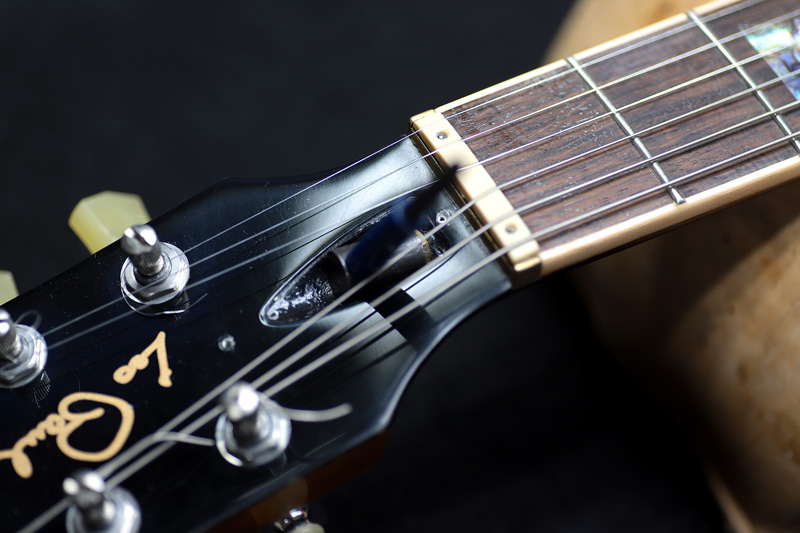
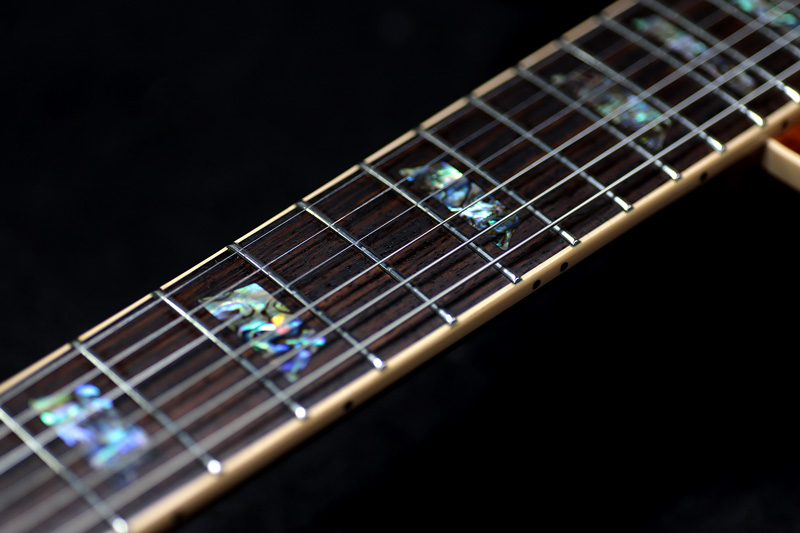
下のホログラムにはレス・ポール氏の顔が。
その下を見ると、なにやら切れ目が・・・
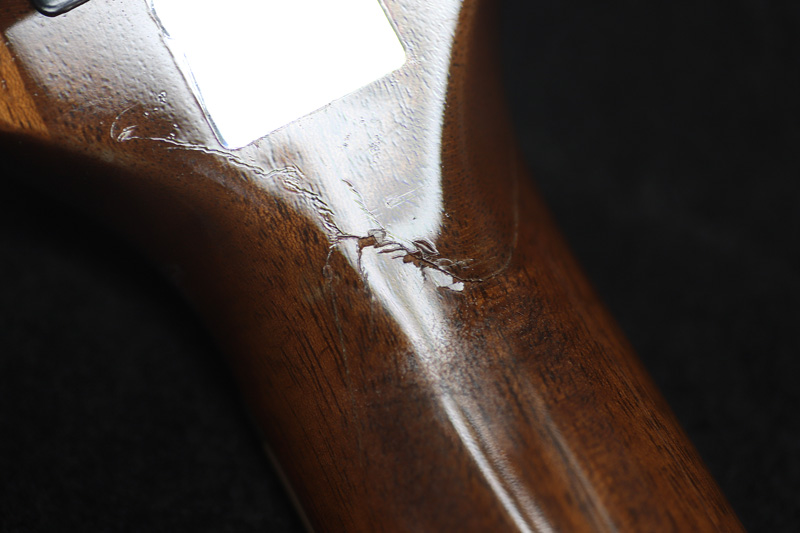
落としてヒビが入ってしまったようです。
ネック接着
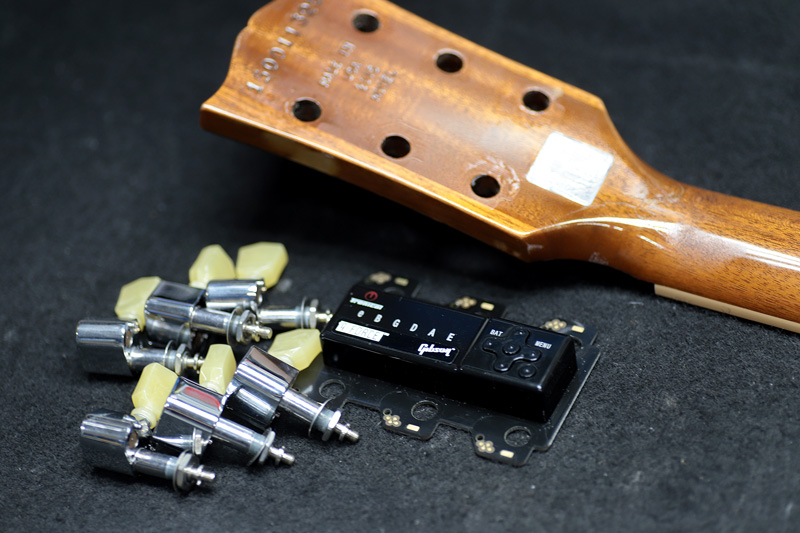
一旦G FORCE、ペグを外します。
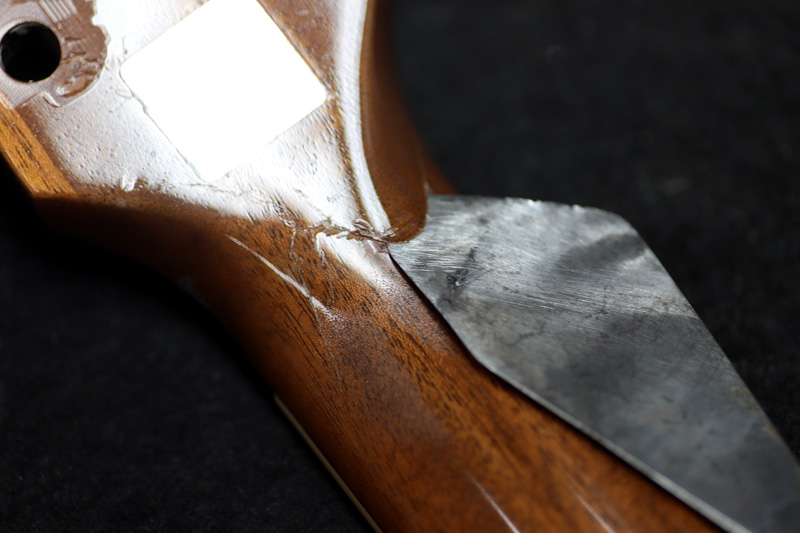
スクレーパーを入れると結構入っていきます。
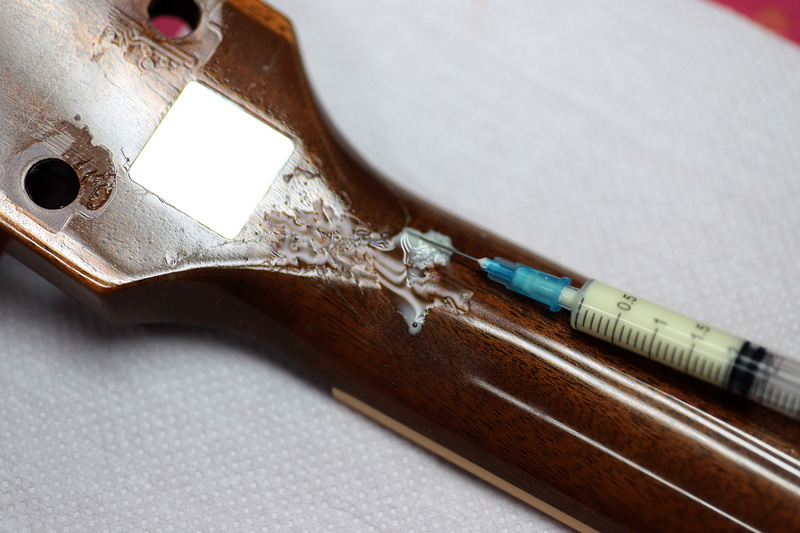
注射器に接着剤を入れ、隙間へ流し込んでいきます。
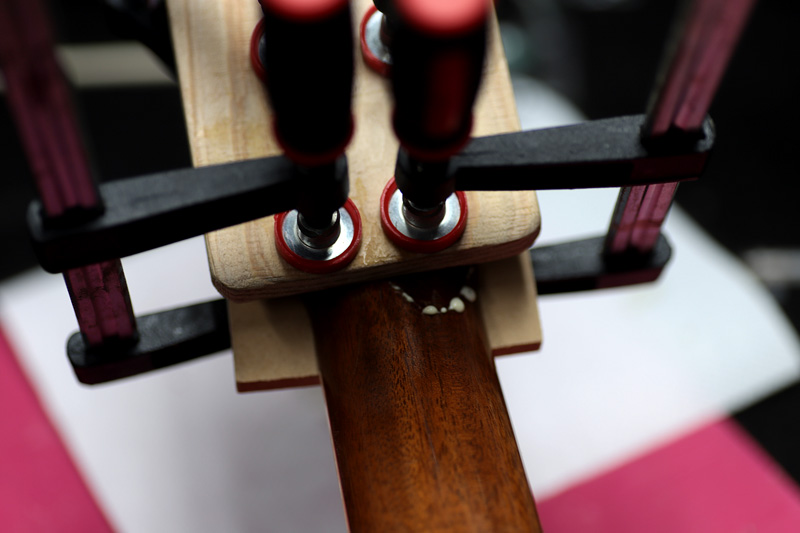
取り合えずこの状態でクランプし固着させます。
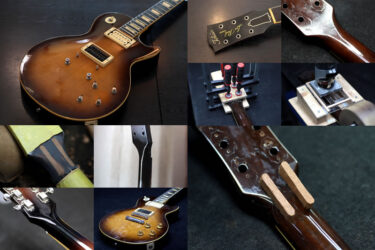
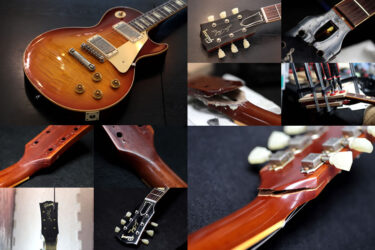
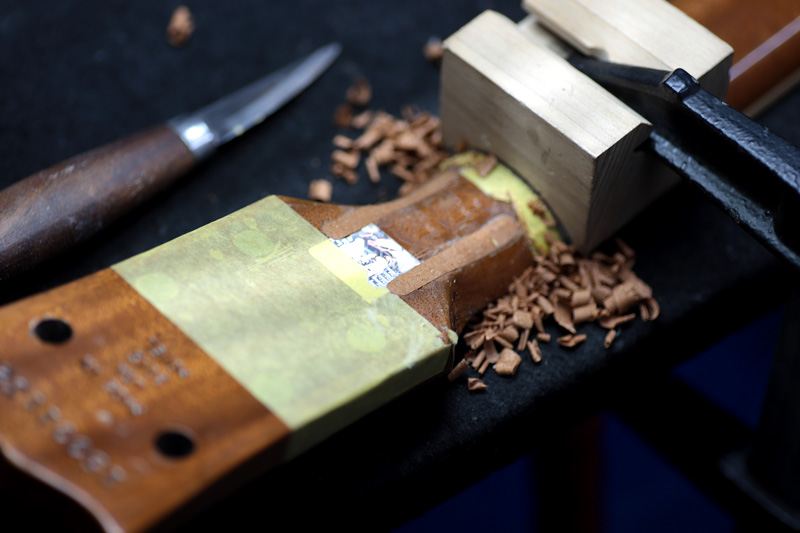
補強材 穴あけ
1週間位経過し、切れ目は綺麗に接着されました。
ただ動きはあるので補強材を入れる事にしました。

トリマーで2本、補強材の為のスロットを掘ります。
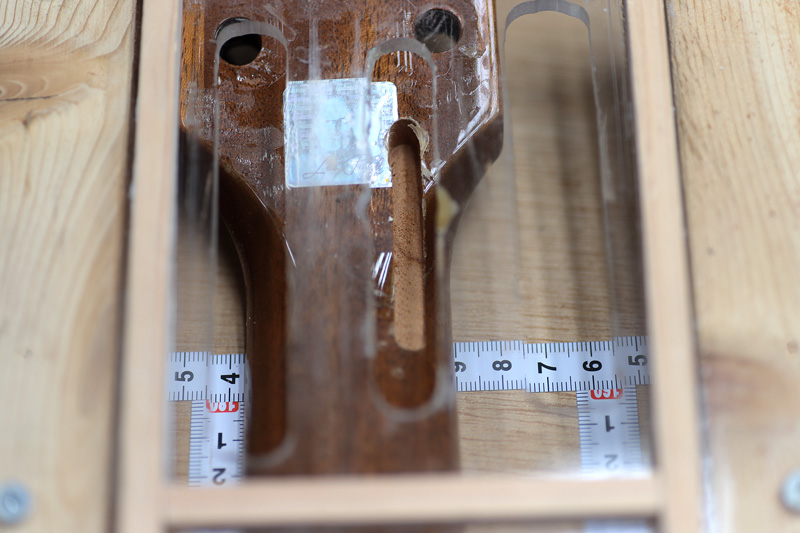
左右に1本ずつ
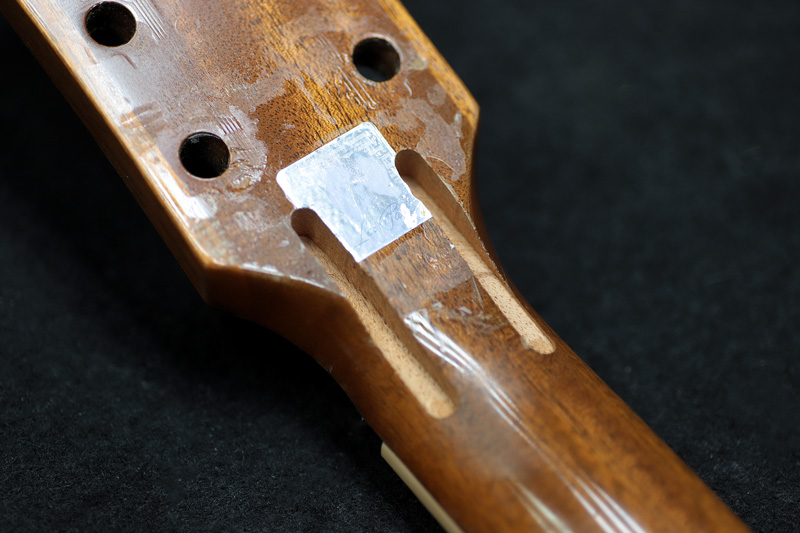
ホログラムを出来るだけ残しつつ、2本掘りました。
補強材 接着
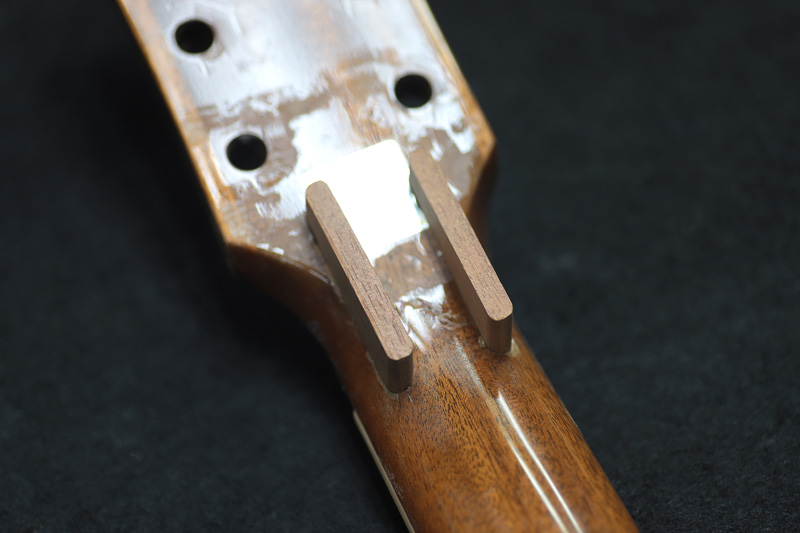
ネック材と同じマホガニーを切り出し補強を入れました。
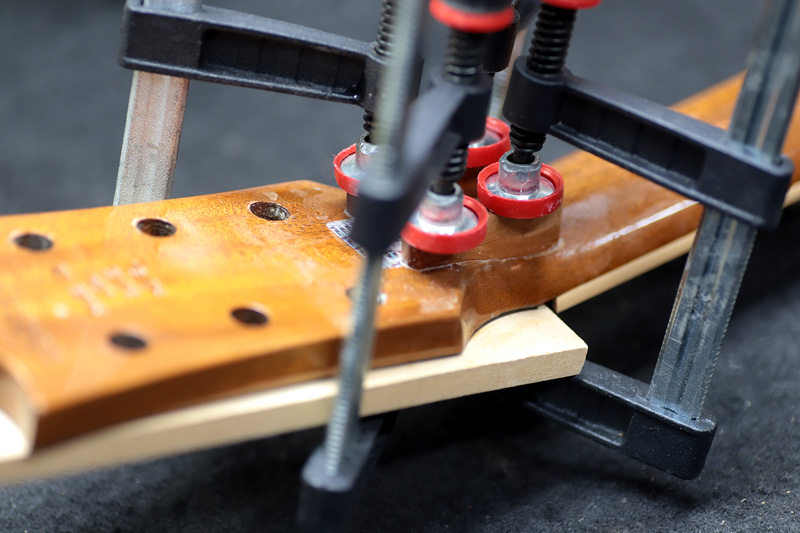
これでまた1週間位固着、乾燥。
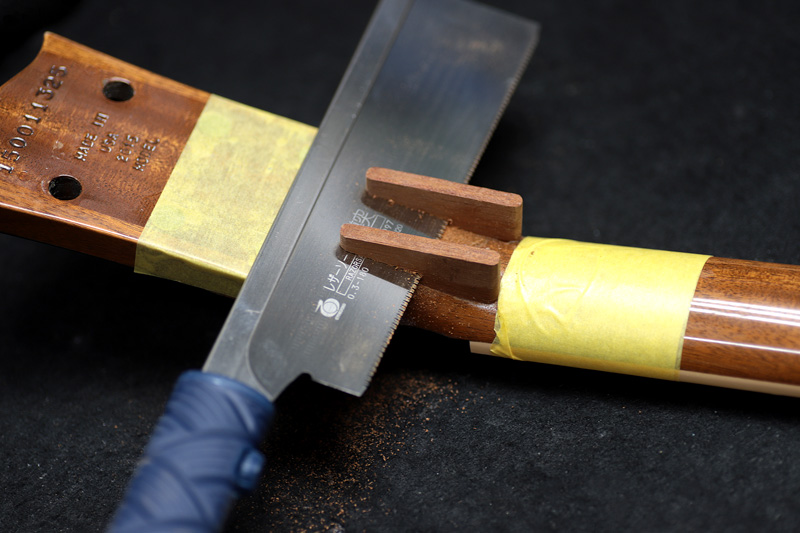
要らない部分をカットして
ナイフで残りをトリム。
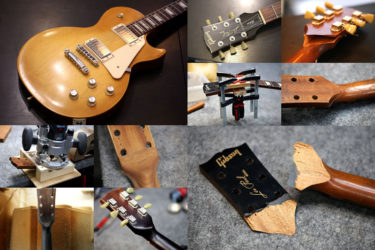
着色 塗装

最近良く登場するGlu Boost。Jescarから送って貰いました。
木地のシーラーの代わりに。
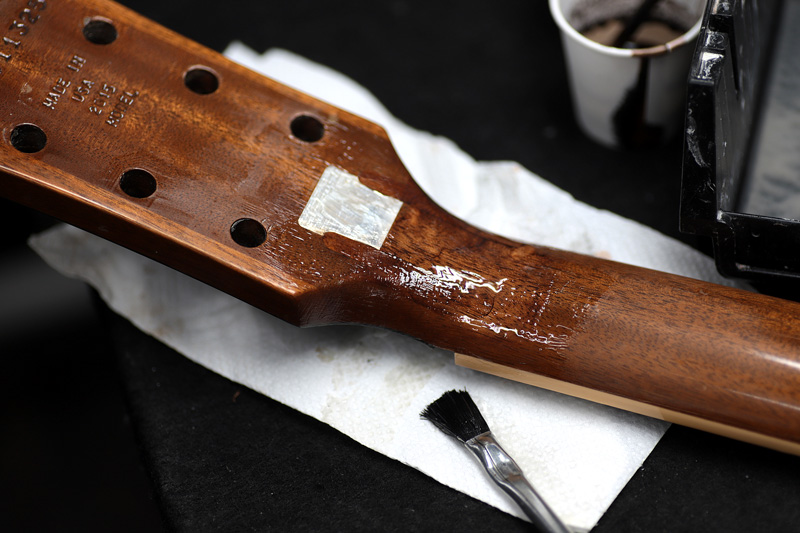
サンディングシーラーに少し顔料を入れて着色。
乾燥、研磨後にガンで着色、トップコート。
ホログラムもこのまま塗装しました。
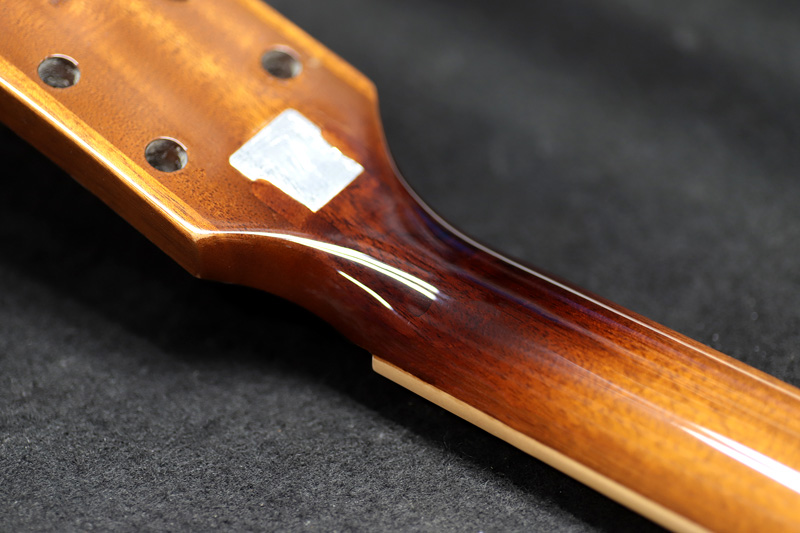
そんなにガッツリ補強材の目は潰さずにバースト。
全然強度も問題無さそうです。
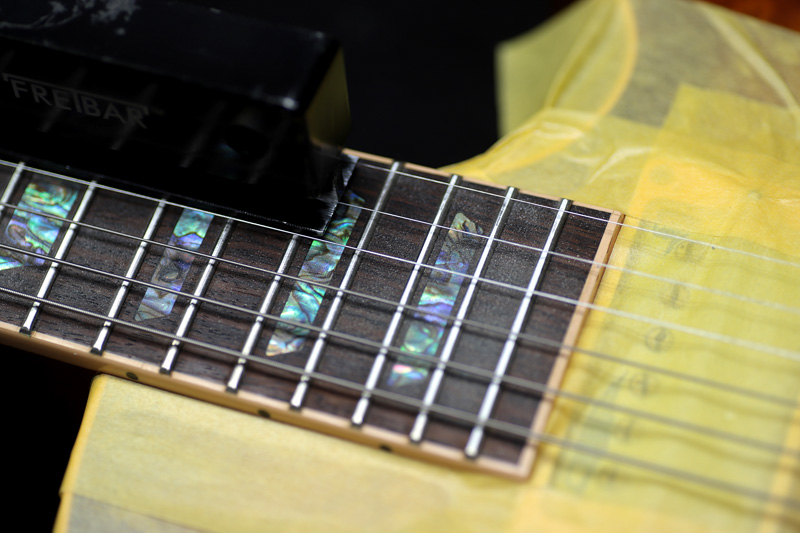
フレットすり合わせ
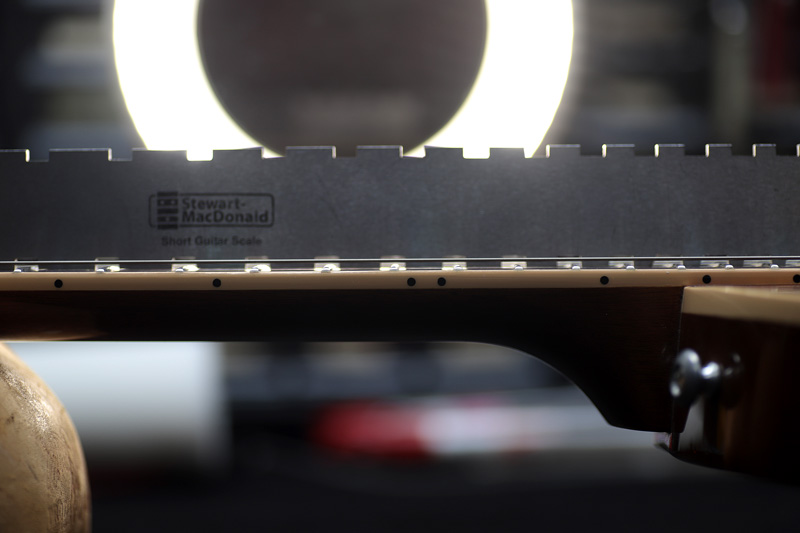
続いてネックのチェック。
少しだけ順反り。
トラスロッドを調整しネックをフラットに
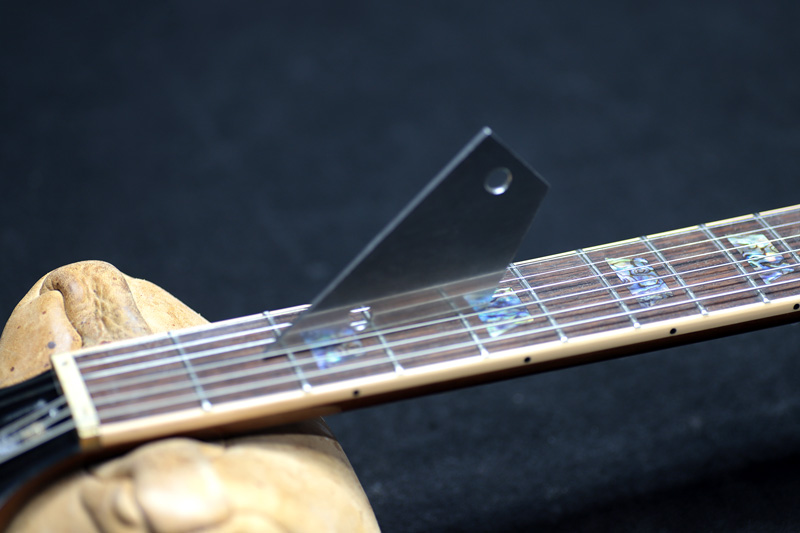
各フレットの高さチェック
ところどころガタガタな個所があったのでフレットすり合わせを行いました。
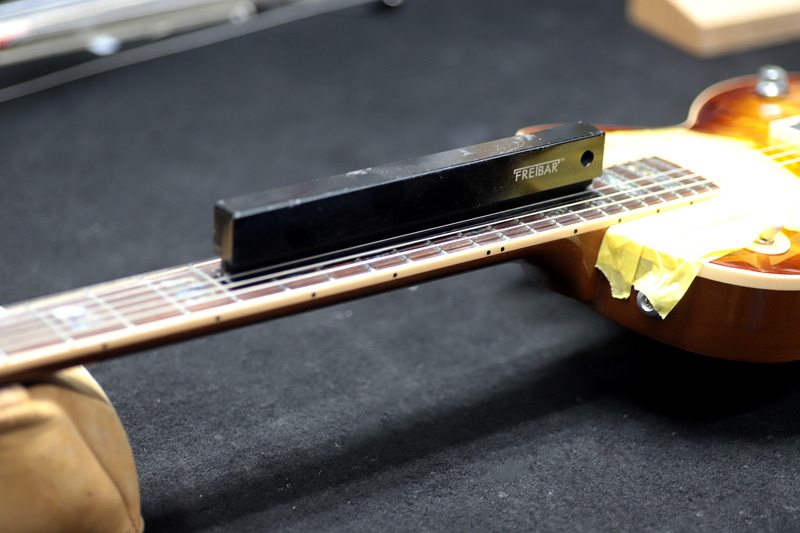
特にハイフレット部分。
ストレートブロックで研磨。
ハイ浮きはどうしても起きてしまいますね。
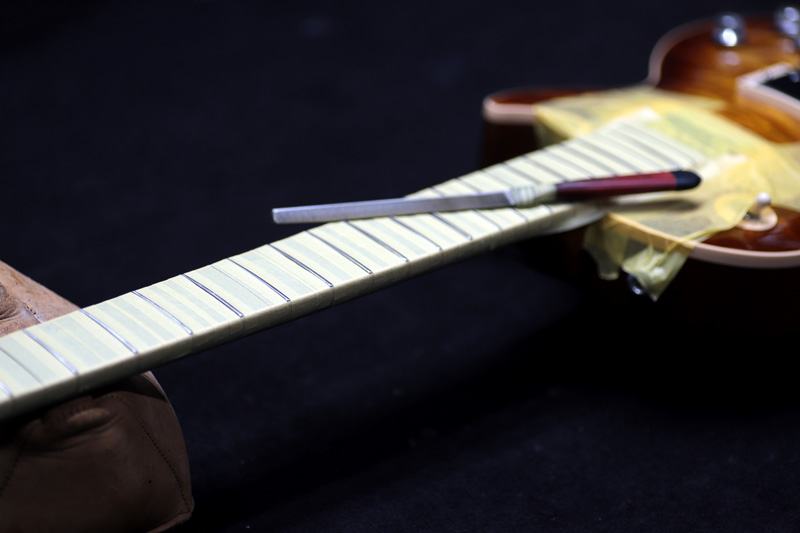
平になったフレットを研磨。
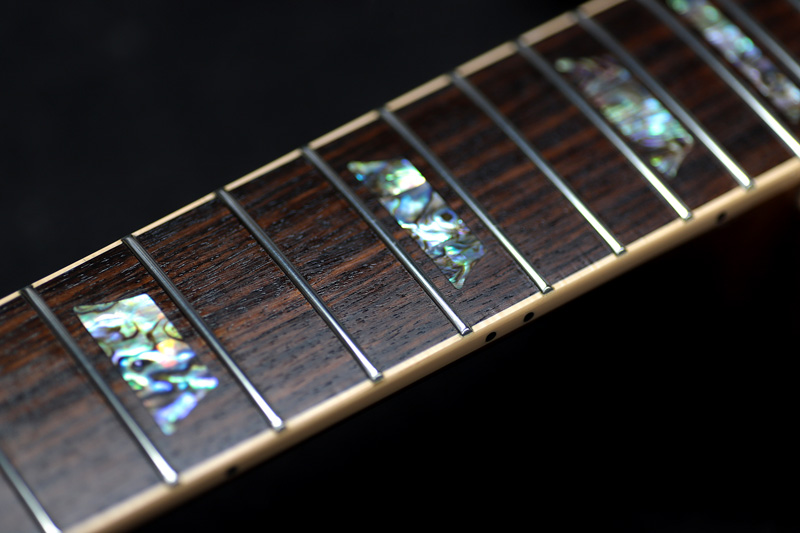
ヤスリ掛け、コンパウンドで磨いて、指板にもオイルを塗布。
弦を張って最終調整。
ビビりは全く無くなりました。
このチューニングは慣れないとさっぱりやり方が分かりませんね^^
このシリーズはケースも豪華な仕様でした。
トップも滅茶滅茶綺麗ですね。
ギター、ベース等の修理は お気軽にご相談下さい。
宜しくお願いいたします。