TOKAI LS-60
Repair of the Day
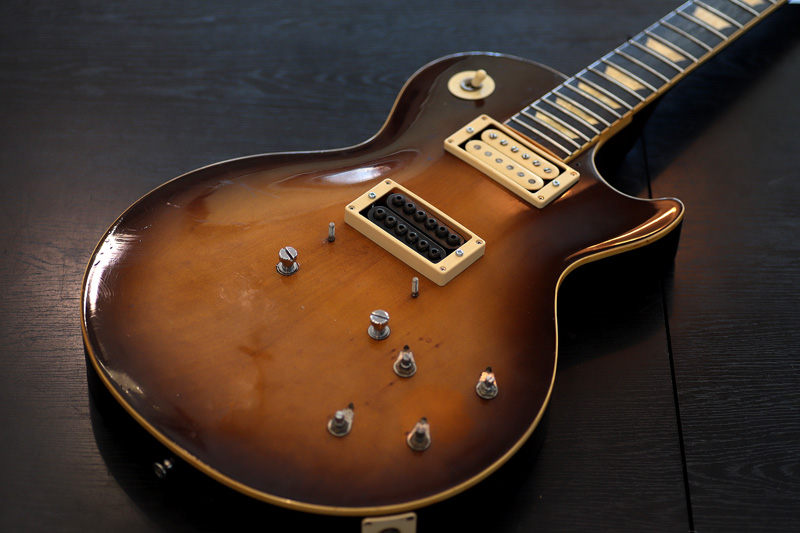
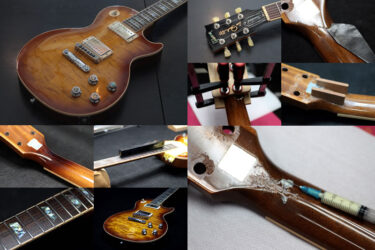
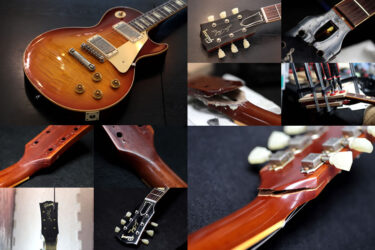
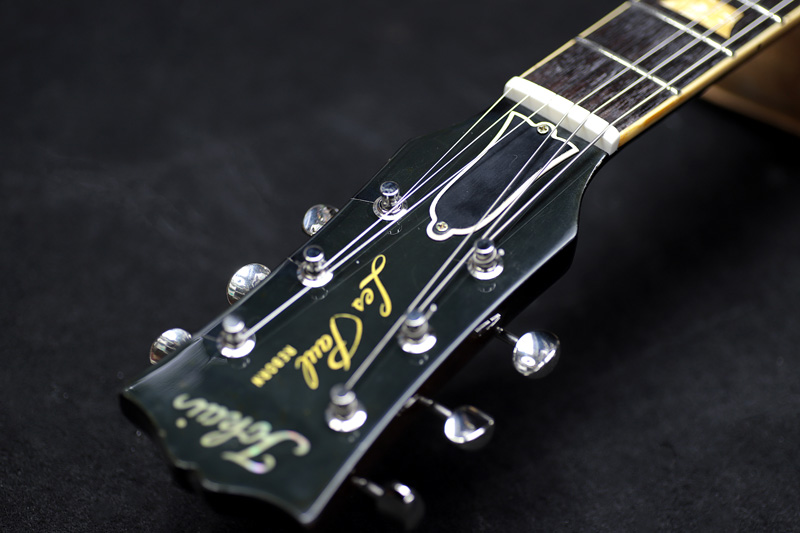
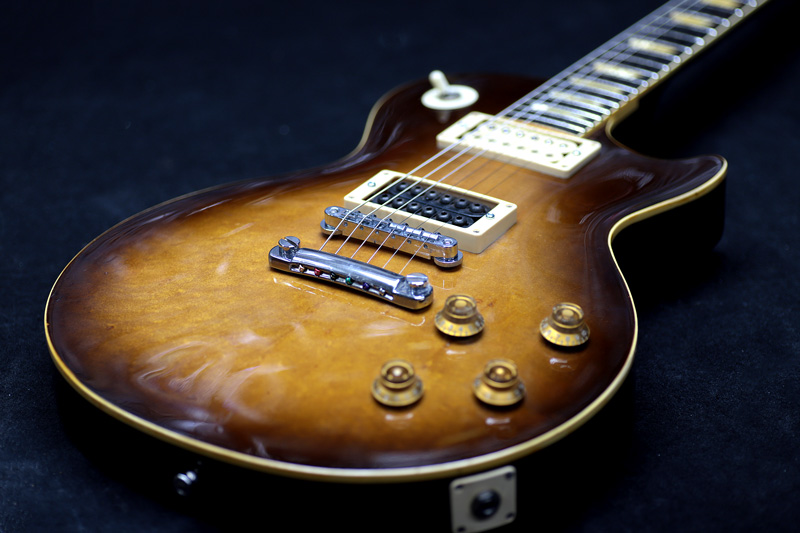
TOKAI LS-60
トーカイのレスポールタイプ
70年代に発売されたLSシリーズ。
様々なグレードがあり、今でもコンディションの良い物は海外で大変高値で取引されています。
それぐらい精度が高く、独特な存在感があります。

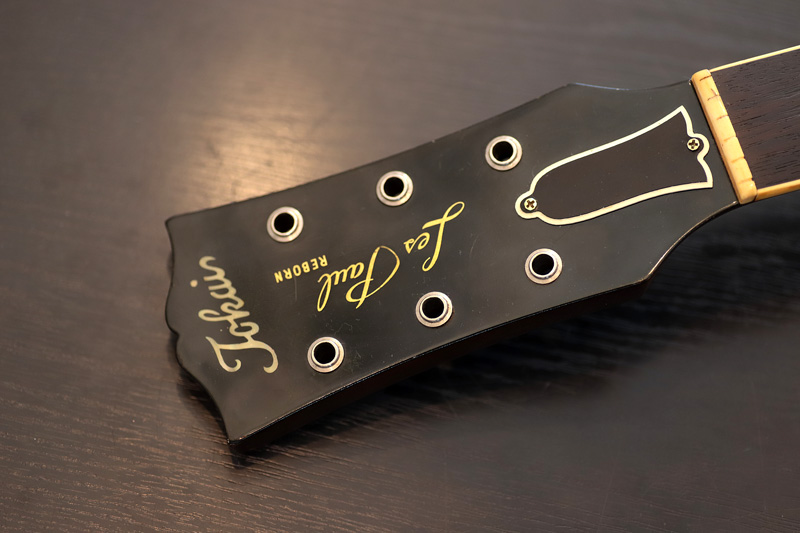
しばらく使用しないでずっと保管していたそう。
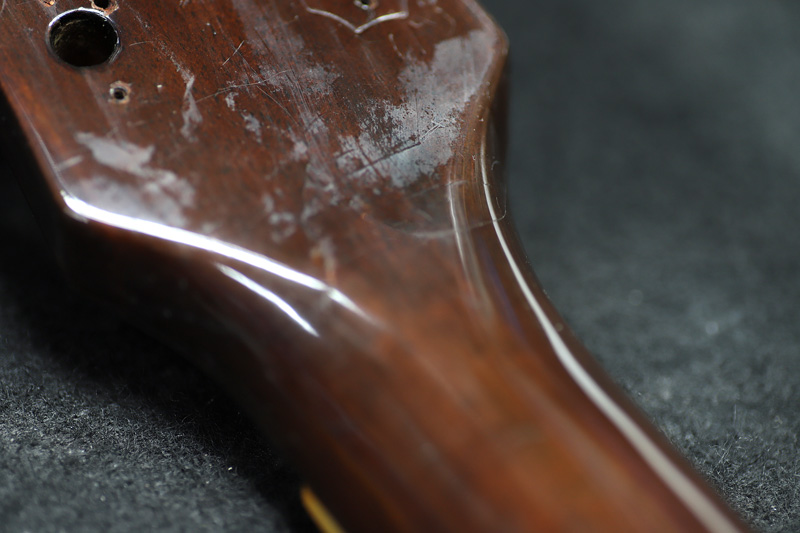
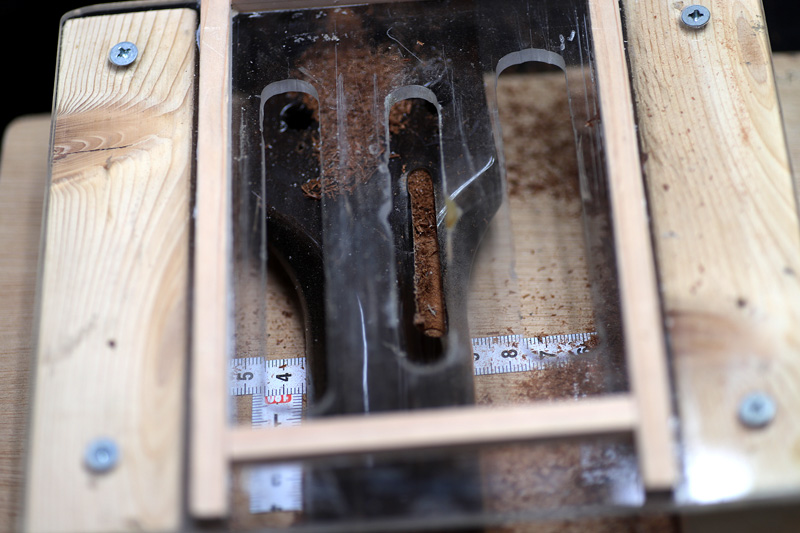
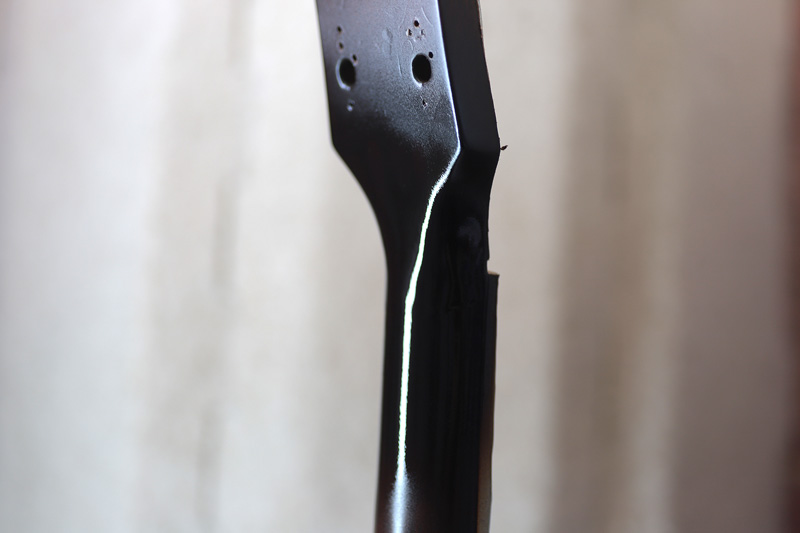
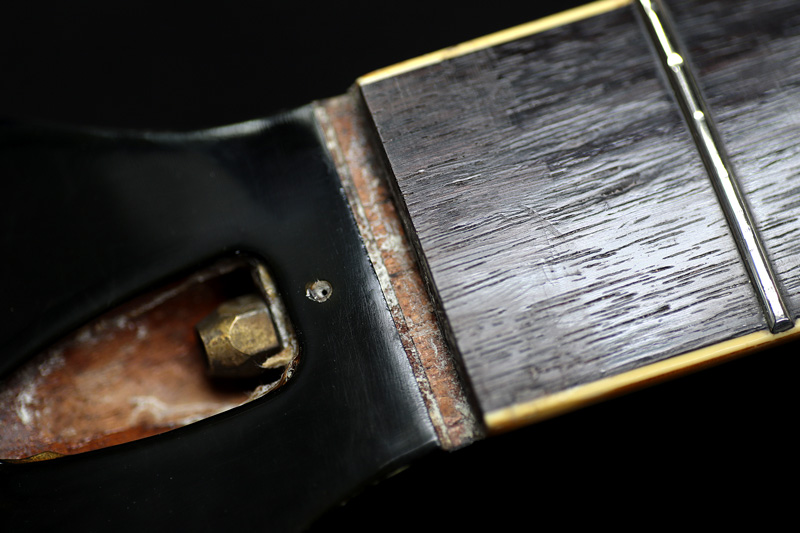
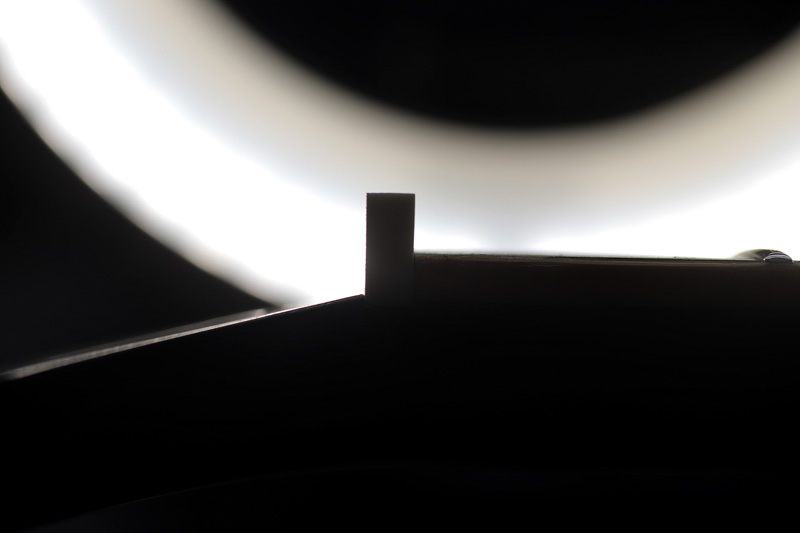
ネックヒビ
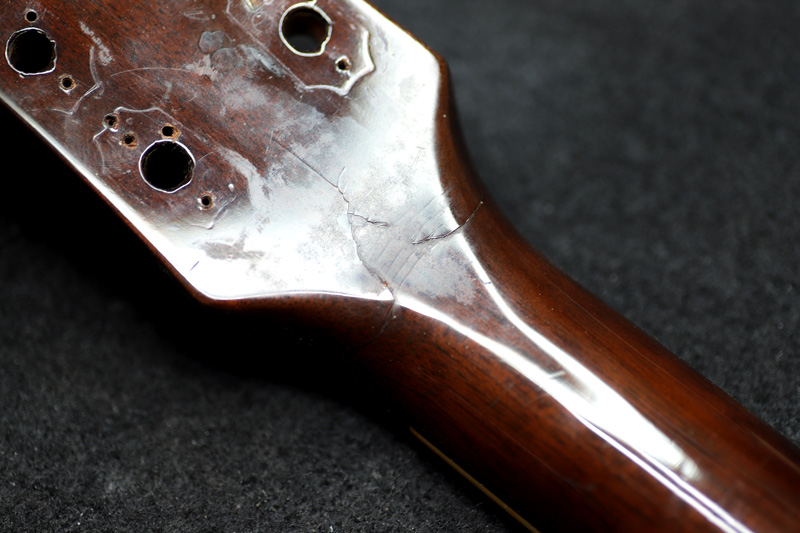
使わなくなったのは、写真のようにヒビが入ってしまった為。
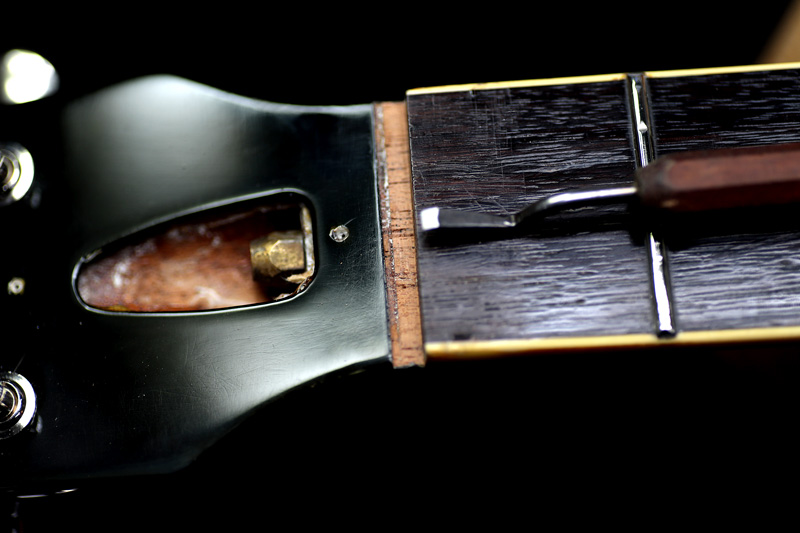
かなり昔に入ったヒビで、見た目よりも深くまで亀裂が達していました。
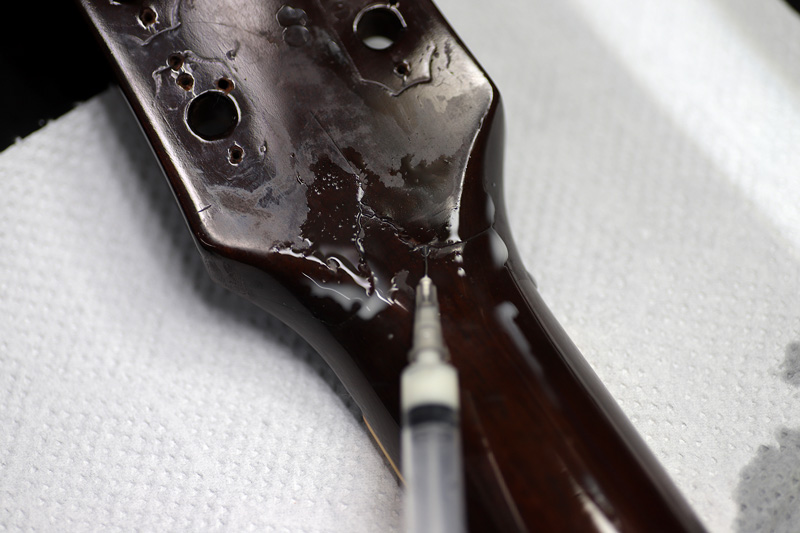
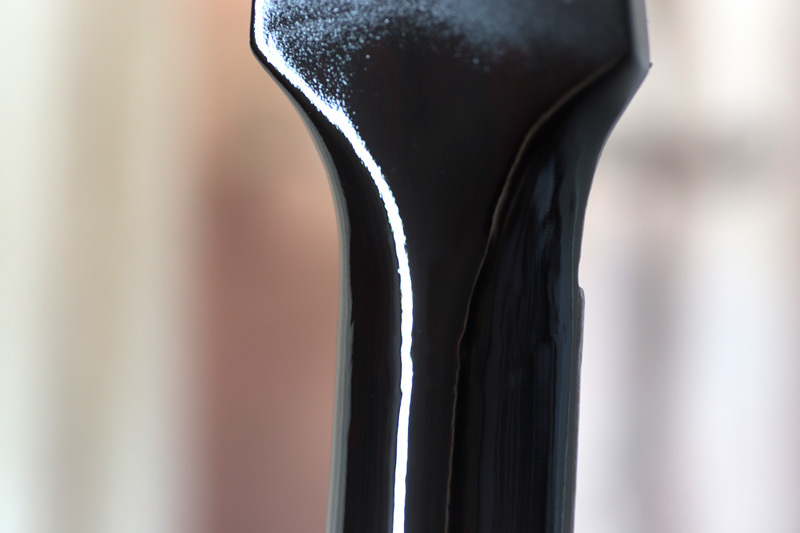
一旦緩めた接着剤を注射器で流し込みます。
結構奥まで針が入りました。
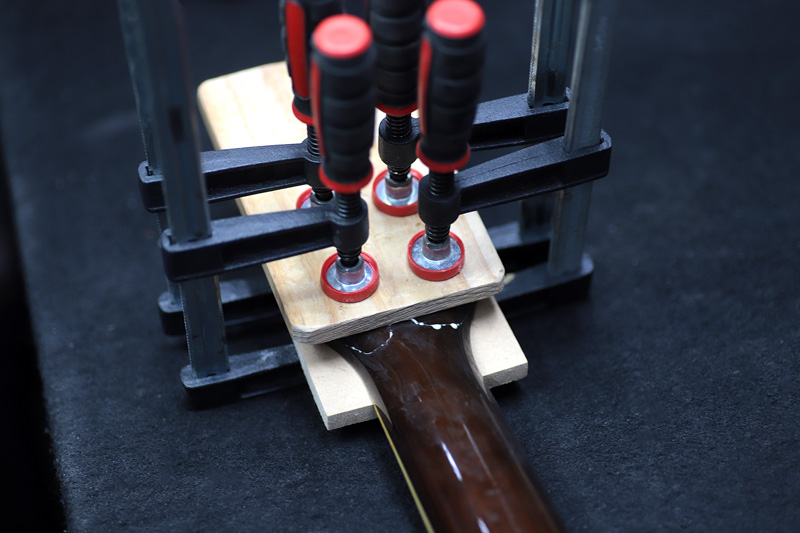
クランプで固定し、このまま固着させます。
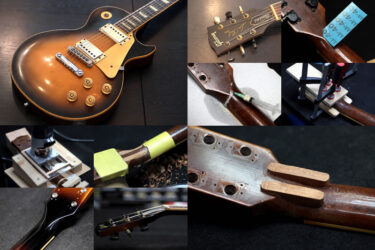
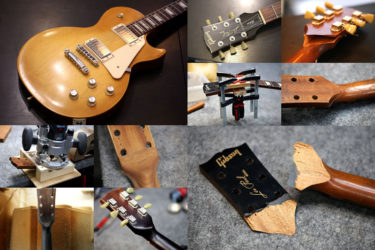
接着、補強材
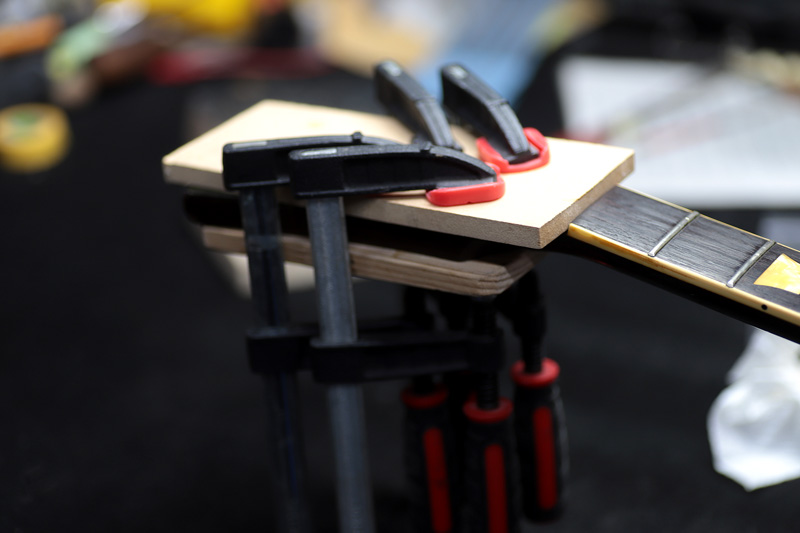
1週間位固定させました。
傷口は綺麗にふさがりました。
ただ割れが生じてから長い時間が経っているようなので、念のため補強材を入れる事にしました。
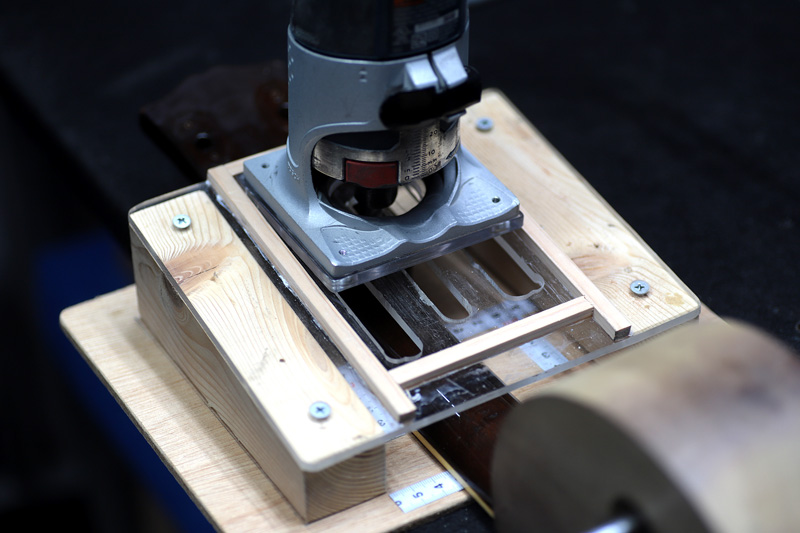
トリマーのジグにセットし穴を開けます。
削ってみると、マホガニーっぽいけど何か独特な感じ。
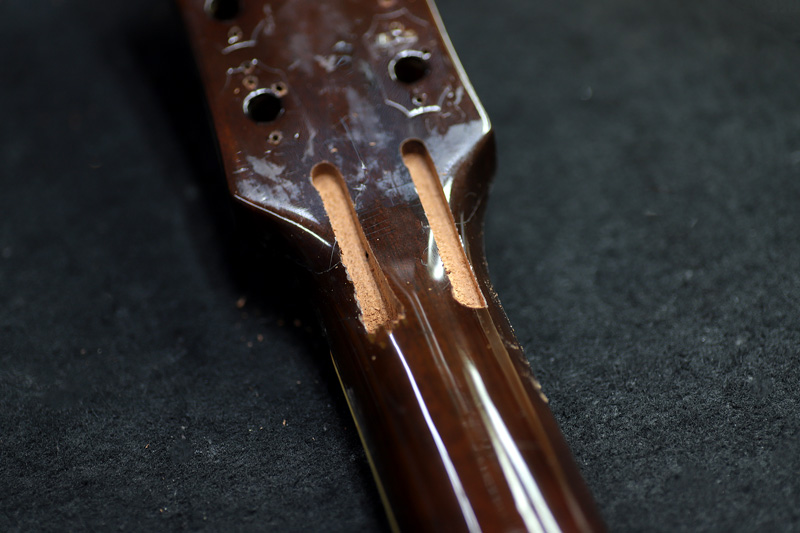
2本開けました。
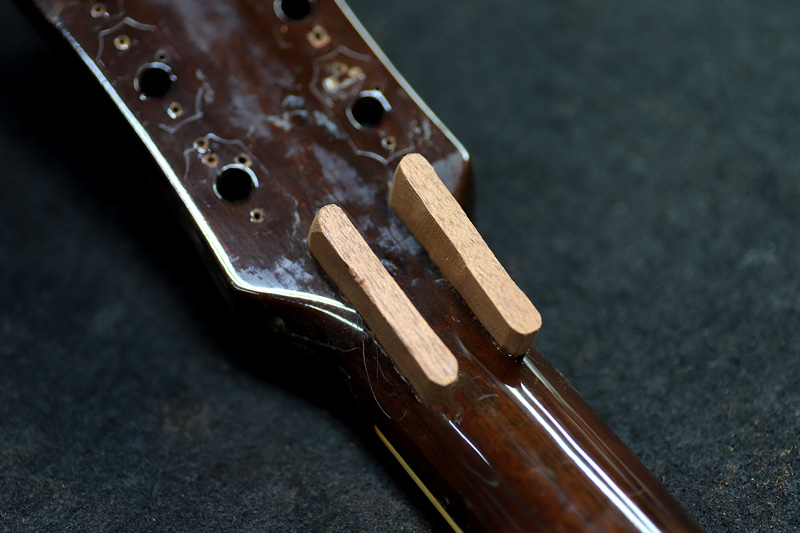
マホガニーを切り出し、縦のグレインを合わせてはめ込み。

これもまた1週間位接着、乾燥待ち。
固着したら面に合わせてトリム。
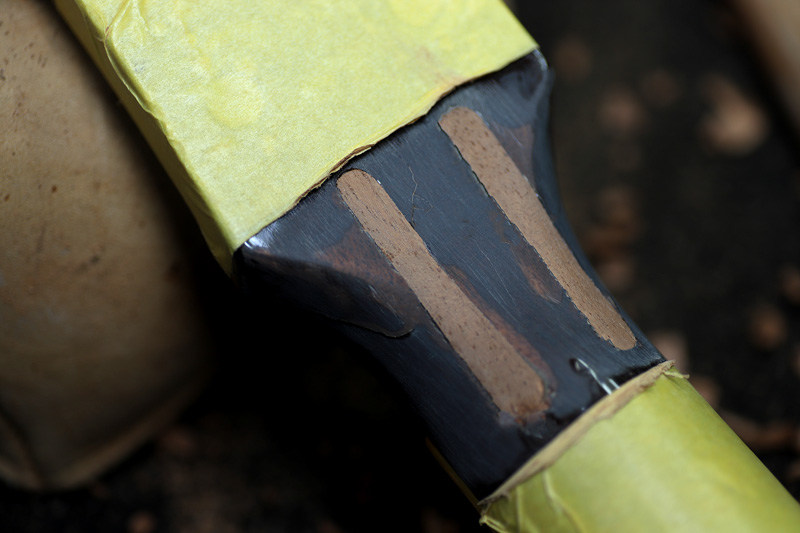
強度は全く問題ないようです。
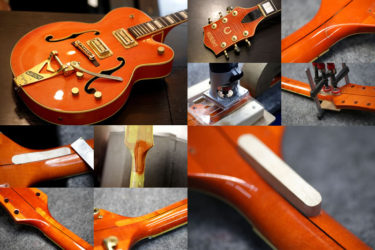
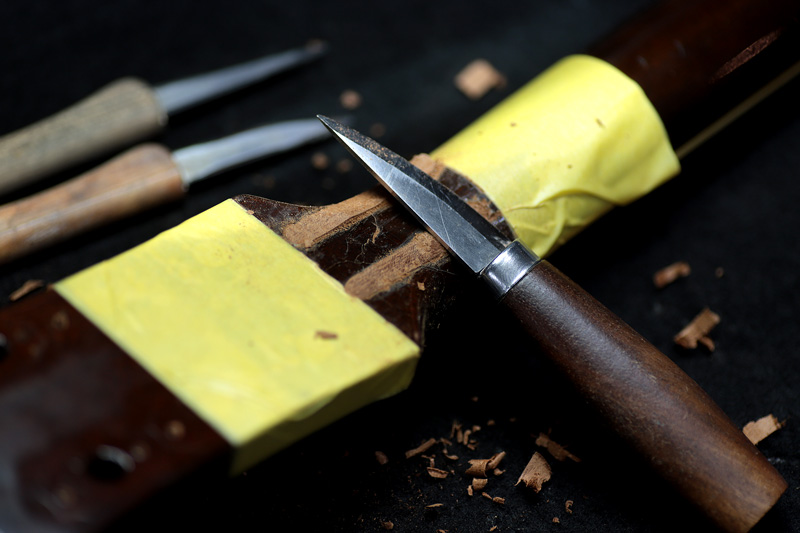
塗装
補強材の継ぎ目が目立たないようにダークブラウンでバースト塗装。
全然見えなくなりました。
クリアを吹いて水研ぎ
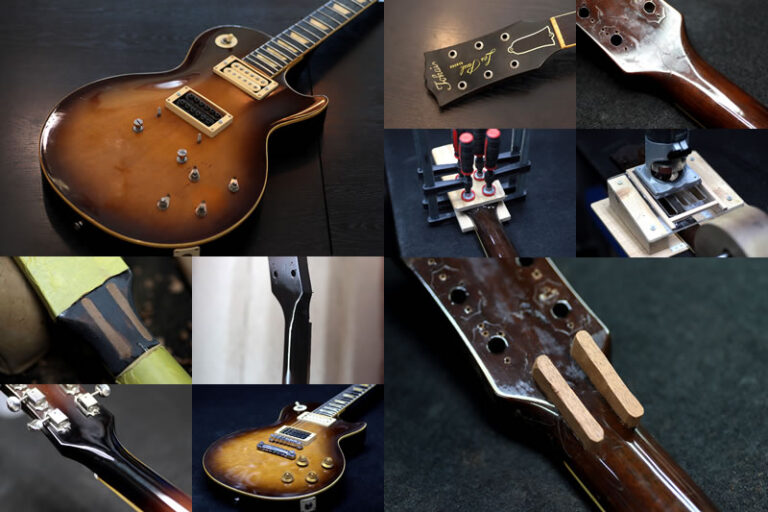
ペグ交換
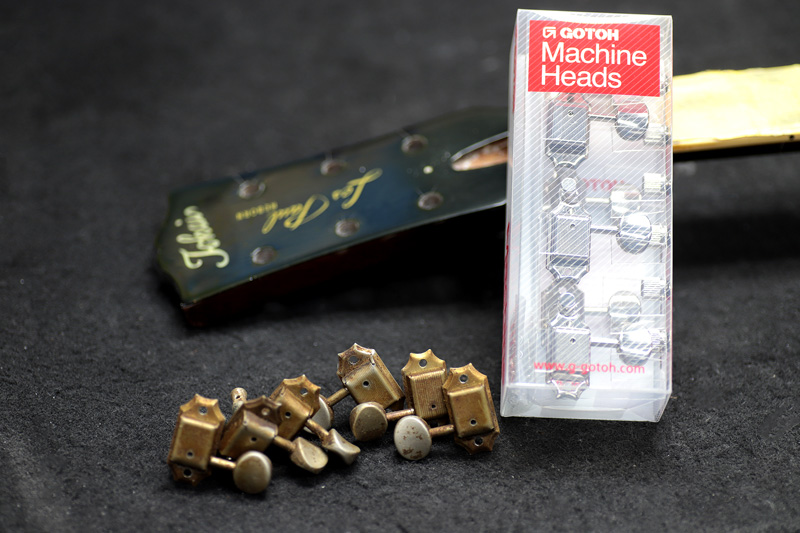
なぜかクルーソンタイプのペグが付いていました。
同じ物に交換。
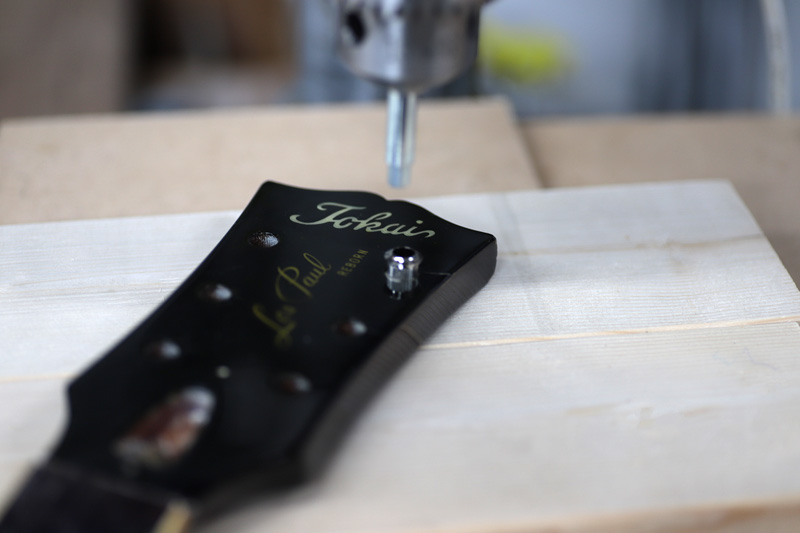
ブッシュはボール盤で押し込みます。
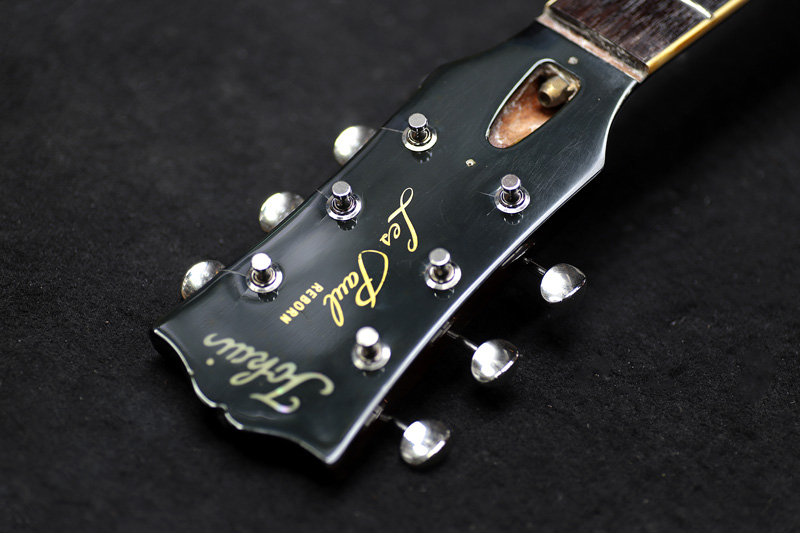
全て換装
POT交換
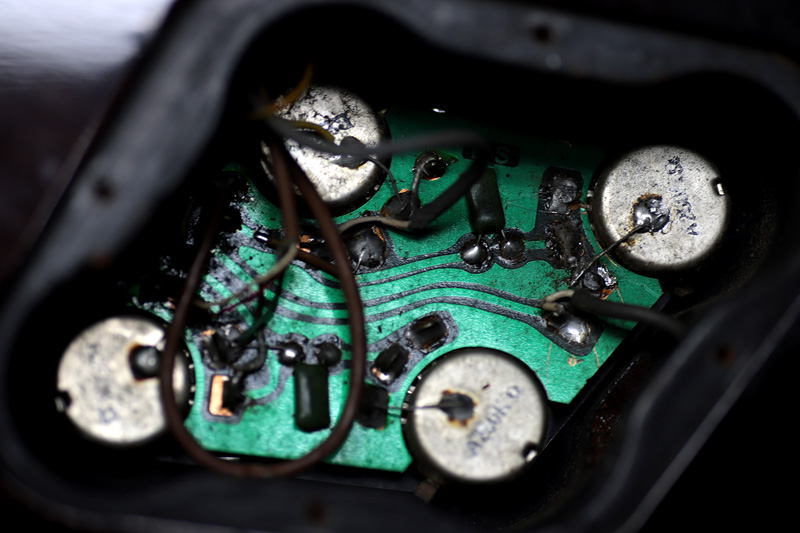
コントロール部分ですがポットが回らないので基板を取って全て交換します。
オリジナルは何故か全て250Kでした。
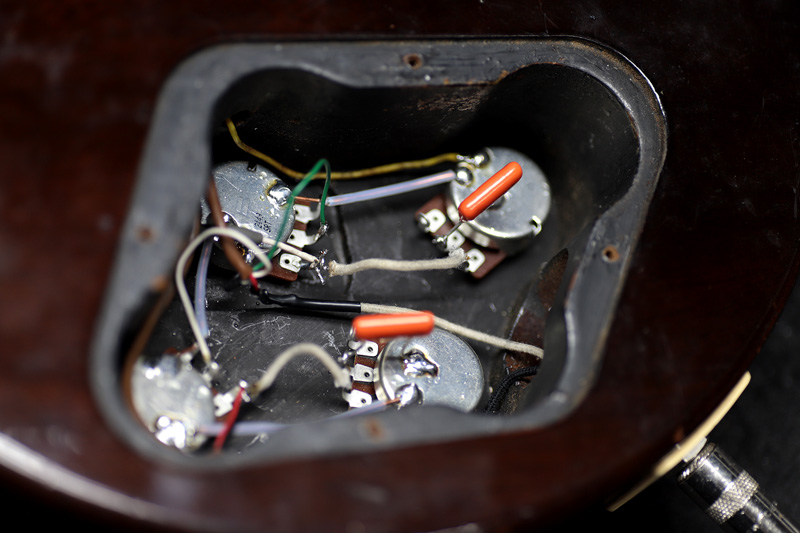
POT、コンデンサーを交換。
ナット交換
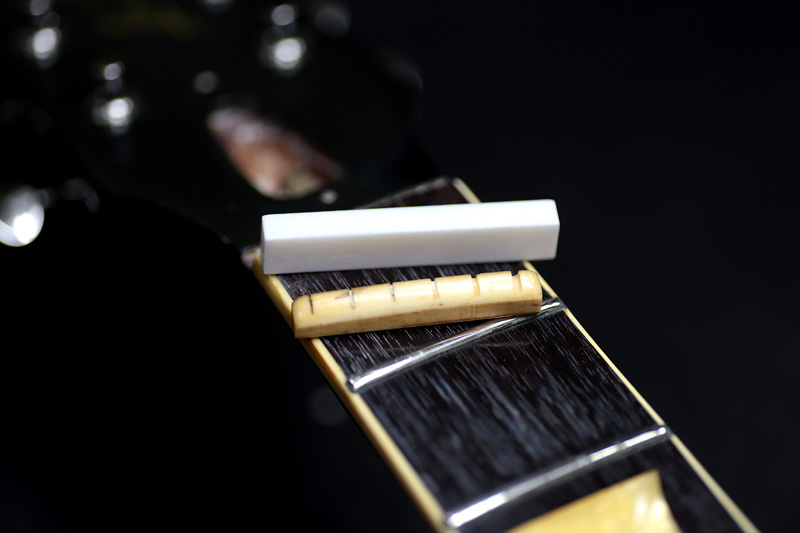
ナットも牛骨に交換
元のナットを外して接着剤の跡をクリーニング
チゼルで綺麗に除去
スロットに合わせ隙間の無いように加工します。
完了
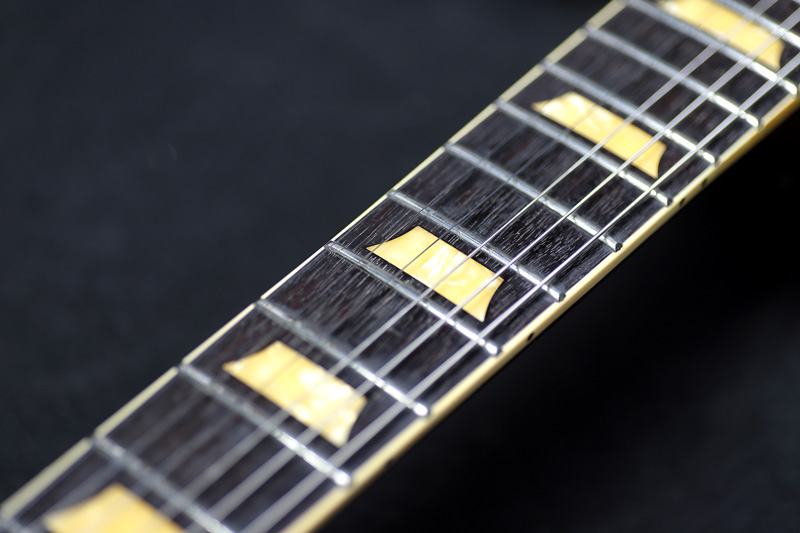
指板もクリーニングしフレットも研磨
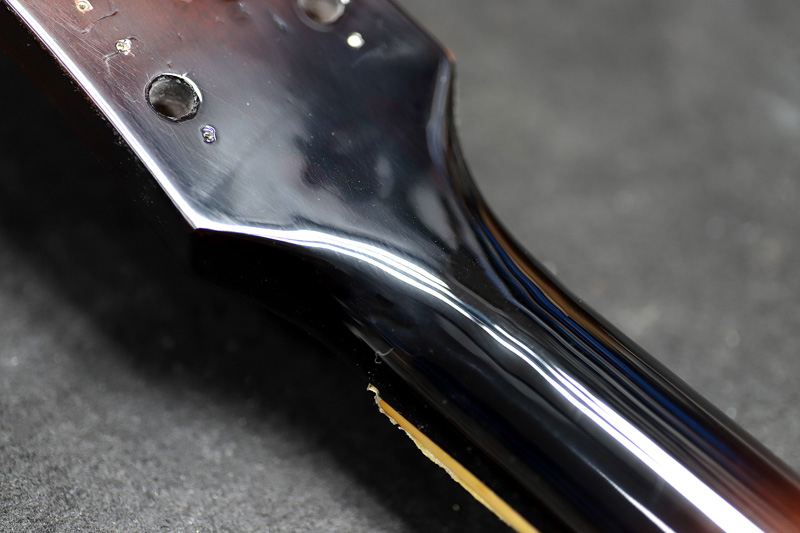
再度研磨してバフ掛け
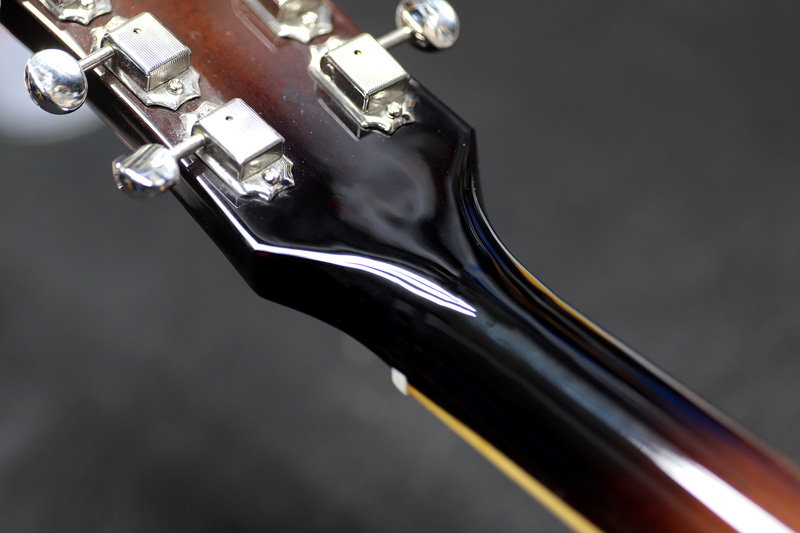
折れた跡は全く見えません。
蘇ったフォルム
めちゃめちゃ美しいギターでした。
ギター、ベース等の修理は お気軽にご相談下さい。
お願いいたします。